User Creation
Updated
by bruno.morini@retargetly.com
Within Retargetly DMP it is possible to create users to share the access in the same account. That is, if a person has a team that needs to have the same level of access, they can be provided through a few simple steps.
To access this functionality, we open the drop-down menu in the upper right corner, and select the option "Manage Users":

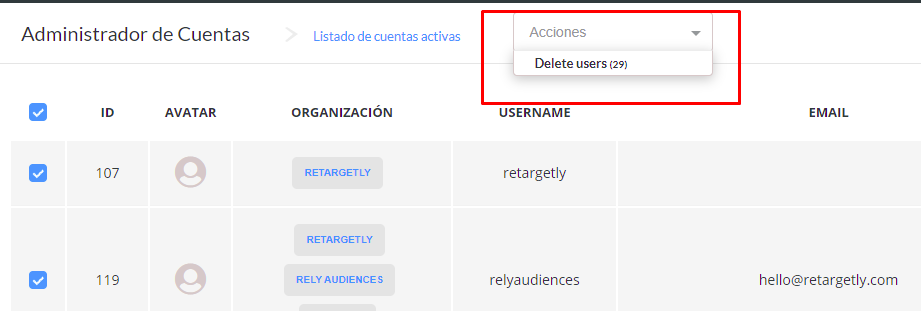
Once there, we will see the list of users who already have access to the account with which we are logged. We can select the email accounts of these people and eliminate access, if necessary, by clicking on "Actions" - "Delete Users":
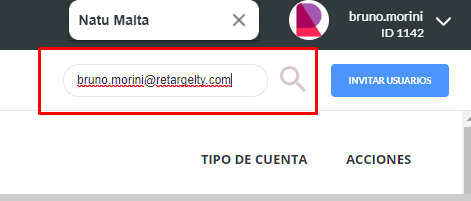
It is possible to search by mail from users who are already in the system to know if it is necessary to register a new access. This can be done from the search bar:
We can also register new users. This is done from the "Invite Users" button. The only required field will be the email of the person who should have access.
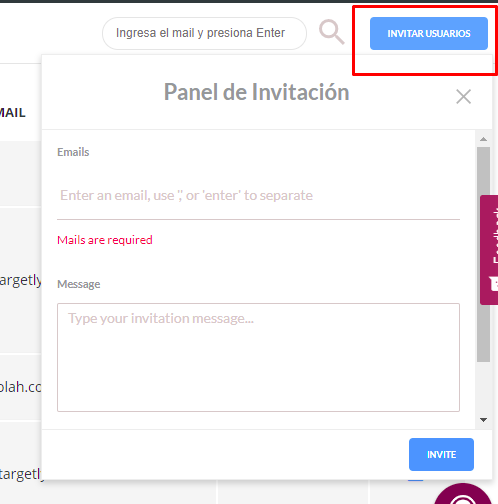
An invitation will come to that email to create the password to access the site. You can give access to several emails in a single invite, you just have to separate them with an Enter. Right here, you can select the permission you wish to grant to the user you are inviting from the “User Permissions” option
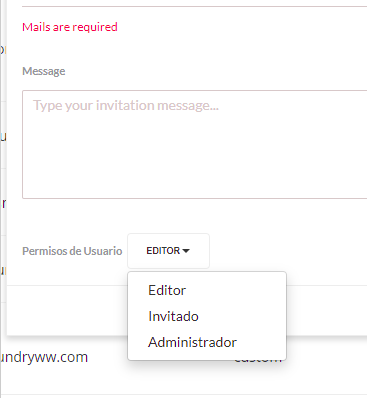
The Editor Access allows modifying accesses, sources, segments and audiences. The Guest only gives access to the account, and the Administrator can modify users.
Once an email is registered, you can set the level of permissions and reset their passwords. For this we must select the blue button next to the mails and click on "Edit User":

Entering that option we will find a wider menu, where we can:
- Change the Language
- Reset Password
- Set permissions for access level
- In the future, avatars can be selected for new accesses.
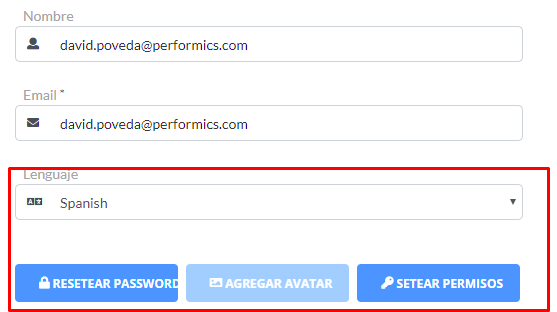
The "Set Permissions" option will open a menu from which you can choose if the selected user can View, Create, Edit and Remove different features within the DMP:
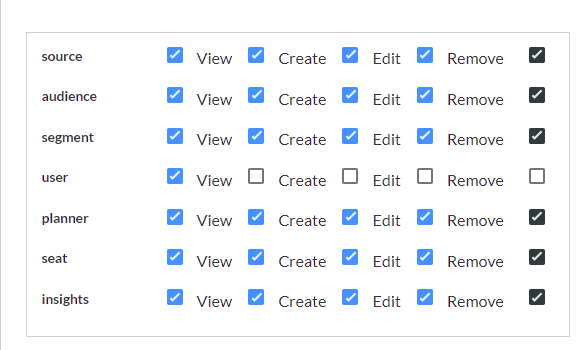
Thus, we can select the level of action that each user to register will have within the platform. This applies to:
- Data Source
- Hearings
- Segments
- Users
- Planner
- Seats
- Insights.
That's it, see you in the next tutorial !!
Regards!
